A warped cutting mat can quickly turn your crafting projects right into an irritating enjoyment. Whether you’re quilting, stitching, or operating on difficult designs, a smooth surface is important for particular cuts and accuracy. But don’t worry studying how to flatten a warped cutting mat is simpler than you might think. In this guide, we’ll stroll you through smooth, powerful techniques to restore your mat’s flatness and keep it in the surest condition. By the cease of this put up, you’ll have all of the recommendations you need to extend your mat’s lifestyles and avoid future warping issues. Let’s dive in!
Prepare Your Workspace for the Flattening Process
Before diving into any flattening methods, it’s important to prepare your workspace. Clear a flat, solid surface, ideally a large table or floor space, that allows you to lay the placemat entirely flat. Make sure the area is clean and free of objects that could cause additional warping or damage during the process. Having towels, weights, and different important objects within attain can streamline the process, ensuring you figure correctly and without interruption. A clutter-free environment not only keeps your placemats but also helps you focus on the task at hand.
Simple DIY Methods to Flatten a Warped Cutting Mat
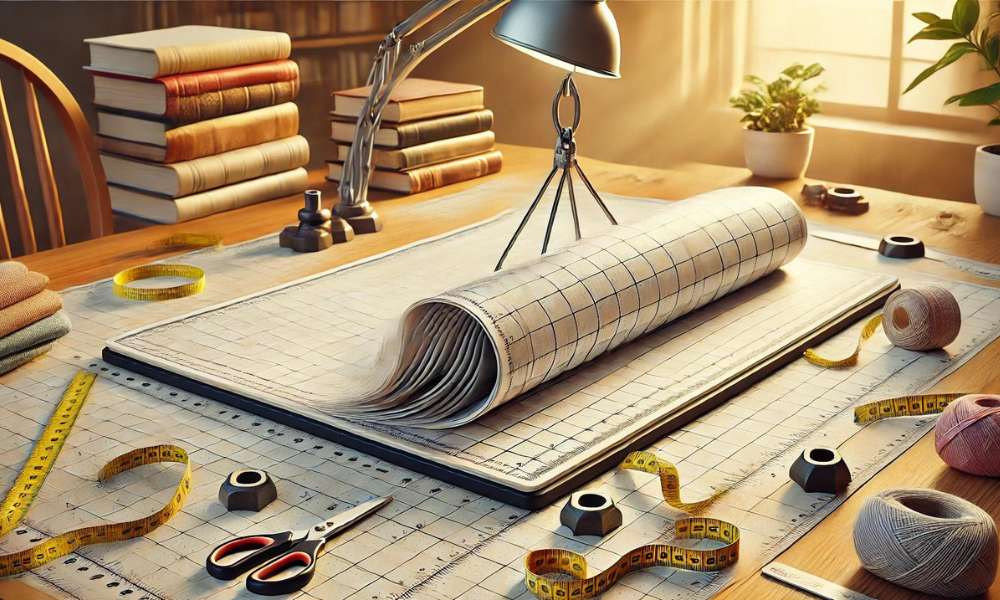
Flattening a warped cutting mat doesn’t always require professional intervention. A common and effective DIY method involves placing heavy, flat objects like books or tiles over the placemat for several hours or even days. The key is applying consistent, even pressure across the entire surface to encourage the placemat to regain its original form. Another approach includes using a warm (not hot) iron over a damp cloth placed on the placemat, allowing gentle heat to relax the material. These simple techniques can clear up minor warping problems without the need for a specialized system.
What Causes a Cutting Mat to Warp?
How to Flatten a Warped Cutting Mat Several factors can cause a cutting mat to warp, but the maximum not unusual culprits are heat, moisture, and fallacious storage. Leaving a placemat exposed to direct sunlight or placing it near a heat source can cause the plastic to soften and bend. Similarly, moisture, when trapped under a mat or absorbed by its surface, can cause uneven expansion, resulting in warping. Lastly, rolling or folding the placemat for storage rather than keeping it flat can lead to long-term distortion. Understanding these reasons can help save you from future warping and lengthen the lifespan of your placemat.
Why You Shouldn’t Ignore a Warped-Cutting Mat
Ignoring a warped reducing mat can result in more than just frustration. A distorted placemat affects the accuracy of your cuts, doubtlessly ruining initiatives or losing materials. Inaccurate measurements and jagged edges can grow to be the norm, which may be expensive, especially for difficult or large-scale tasks. Over time, the placemat can also emerge as permanently misshapen if left unchecked, rendering it unusable. By addressing the difficulty early, you keep away from large troubles and make certain your crafting continues easily.
The Weighting Method for a Gradual Fix
One of the most tried-and-true methods for flattening a cutting mat is the weighting technique. This gradual approach involves placing heavy, evenly distributed weights such as books, weights, or tiles over the warped placemat. It’s crucial to make sure that the pressure is applied uniformly throughout the floor to prevent similar harm. Leave the weights on for at least 24 hours, checking periodically to see if the placemat has regained its flatness. This method works best for mild to moderate warping and can be repeated if necessary.
Alternative Techniques Warm Bath for Deep Warp
For more severe warping, the warm bath method can offer a deeper fix. Start by filling a bathtub or large container with lukewarm water—never use hot water as it could damage the mat permanently. Submerge the cutting mat entirely for about 10 to 15 minutes. Once removed, carefully lay the placemat on a flat surface and use heavy objects to hold it down while it cools. This technique works by softening the placemat, allowing it to reset to a flat state as it dries. Be sure to handle the placemat gently when it’s wet to avoid stretching or tearing.
How Long Should You Leave a Cutting Mat Under Pressure?
The duration of time a cutting placemat needs to stay under pressure depends on the severity of the warp. For minor warping, 24 to 48 hours is usually sufficient. However, for more significant distortions, you may need to leave the placemat pressed for several days. It’s essential to monitor the progress regularly. If, after several days, the placemat hasn’t returned to its flat form, additional pressure or another method, such as a warm bath, may be necessary. Patience is fundamental, as dashing the procedure ought to lead to additional harm.
How to Avoid Further Damage During Flattening
While attempting to flatten your cutting mat, it’s important to be cautious and avoid causing additional damage. Never expose your placemat to extreme heat, as this can melt or warp the material beyond repair. Additionally, avoid placing sharp objects or uneven weights on the placemat, which could leave dents or punctures. If using heat-based methods like ironing, always keep a cloth between the placemat and the heat source to prevent scorching. Ensuring an even application of pressure is also crucial to avoid new waves or bends from forming.
Maintenance Tips How to Keep Your Cutting Mat Flat
Prevention is always better than cure. To keep your cutting mat in optimal condition and prevent future warping, store it flat in a cool, dry place. Avoid rolling or folding the placemat for storage, and keep it away from direct sunlight or heat sources that could soften the plastic. Regularly clean your placemat with a mild soap solution to remove debris and prevent dirt buildup. Investing in a storage solution that allows your mat to remain flat when not in use is a long-term strategy for maintaining its durability.
What to Do if the Mat Doesn’t Flatten Completely
Despite your best efforts, there may be cases where your cutting mat doesn’t fully flatten. If minor warping persists, you can still use the placemat but focus on cutting in the flattest areas to maintain precision. Alternatively, try repeating the flattening methods with increased pressure or extended time. However, if the placemat remains too distorted for effective use, it might be time to consider replacing it to ensure the quality of your projects isn’t compromised.
When to Replace Your Cutting Mat
There comes a time when every cutting placemat reaches the end of its useful life. If your mat is heavily warped, stained, or deeply scored with cut marks that interfere with its surface integrity, replacement is the best option. A cutting mat that no longer lies flat or has lost its self-healing properties will only hinder your crafting efforts. Investing in a new, durable placemat ensures that your projects remain precise and frustration-free.
Best Cutting Mats for Durability and Longevity
When replacing your reducing mat, remember one made from brilliant, durable materials that offer durability and resilience. Look for self-restoration placemats, that can face up to repeated reducing without showing marks. Placemats with grid strains and dimension markings are also useful for specific work. Brands like Olfa, Fiskars, and Alvin provide cutting mats acknowledged for their durability, and investing in these merchandise can save you from common replacements. The proper placemat can make all of the difference to your crafting experience.
Crafting Alternatives While Your Mat is Flattening
How to Flatten a Warped Cutting Mat While your placemat is undergoing the flattening process, you don’t have to put your crafting on hold. Consider using temporary alternatives like cardboard, foam board, or even thick layers of paper as a cutting surface. These materials provide a level of protection for your blades and surfaces but should only be used for simple or small-scale projects. Keep in mind that they aren’t as durable or precise as a placemat so they should be seen as short-term solutions.
Conclusion
A warped cutting mat doesn’t have to signal the end of your crafting days. With the right techniques, such as weighting and warm baths, it’s possible to restore your mat to its original flatness. By knowing the causes of warping and taking preventive steps, you may make the existence of your placemat and keep away from destiny distortions. Whether you’re working on a small DIY project or a large-scale craft, a flat, well-maintained cutting mat ensures precision, saves you frustration, and keeps your creative process flowing smoothly.